Motion Pro Shock Spring Compressor
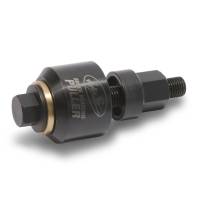
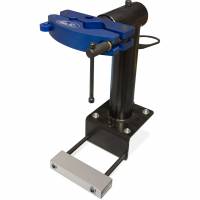
Universal Shock Spring Compressor by Motion Pro. This top-grade product is expertly made in compliance with stringent industry standards to offer a fusion of a well-balanced design and high level of craftsmanship.
Features:
- Safely removes the spring on most coilover shocks
- Includes adapters for both clevis and eyelet type shocks
- Clevis inside width is 35mm, Eyelet width is 17mm
- Adapter plates adjust to fit spring retaining collars from 56 mm to 96 mm
- Innovative, compact, easy to use design
- Low friction radial thrust bearing
- Lifetime limited warranty
- Precisely engineered to ensure ultimate efficiency
- Manufactured using innovative technologies
- Absolute quality, great durability, and solid workmanship
Warning: Removing and installing the spring on a coilover shock is a very dangerous proce-dure and improper use of this tool could result in great bodily injury or death. This tool should only be used by a qualifi ed mechanic that has expertise and training in servicing coilover shock absorbers. Great care should be taken to ensure that the spring and retainers are properly installed. Failure to do so can cause great bodily injury or death. Refer to the fac-tory service manual for your vehicle or shock absorber for further information on spring and shock removal.
Motion Pro Shock Spring Compressor P/N 08-0608
1. Attach either the clevis or eyelet adapter and secure it to the threaded pull rod with the lock nut. Note:Shock clevis is designed to fi t up to 40.5mm wide eyelet
2. Place the motion pro spring compression tool over the shock and install the 10mm pin and clip. If your shock has a threaded clevis, use the OEM mount bolt. Install the bolt fully into the clevis. DO NOT TIGHTEN THE BOLT OR YOU WILL DAMAGE THE SHOCK CLEVIS.
3. Slide the adjuster plates in against the shock spring.
4. Lock them in place using the 6 mm screws.
5. Tighten the nut as shown in the photo to compress the spring using a 30 mm wrench or adjustable end wrench.
6. Continue to compress the spring until the re-taining ring or clip can be removed as shown.
7. The spring can be removed from the shock. To reinstall the spring simply reverse this process.
To reinstall the spring simply reverse this process.


