Motion Pro Fork Oil Level Tool
Universal Fork Oil Level Tool by Motion Pro. For checking and adjusting the oil level on all conventional and single chamber cartridge forks.This top-grade product is expertly made in compliance with stringent industry standards to offer a fusion of a well-balanced design and high level of craftsmanship.
Features:
- For checking and adjusting the oil level on all conventional and single chamber cartridge forks
- Adjustable ring will measure oil levels from 0 to 300mm in 0.5cm increments
- Syringe has a capacity of 60ml
- Can be used on bicycles equipped with front suspension
- Replaces HD® tool HD-590000-B, Buell® tool B-590000-B and Indian® OEM #PV-59000A
- Precisely engineered to ensure ultimate efficiency
- Manufactured using innovative technologies
- Absolute quality, great durability, and solid workmanship
Includes
- (1) Adjustable aluminum collar with screw
- (1) 60ml plastic syringe
- (1) 12" clear rubber hose
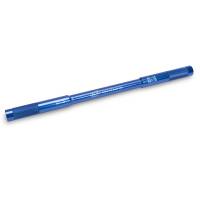
- (1) 12 1/8" long steel tube
- (1) Instructions
Instructions for Fork Oil Level Tool, 08-0121
1. Support the motorcycle securely on a stand with the front wheel off the ground.
2. Using your vehicle’s service manual, perform the steps to the point where the fork tube assemblies are removed. Note: Loosen the fork caps when the top triple clamp bolts are loose, but the bottom triple clamp bolts are still tight.
3. Release any air pressure in the forks before removing the caps. If your forks do not have air fittings, unscrew the caps to the point where the “O” rings unseat. This will bleed any air from the forks. Remove the caps and fork springs.
4. Replace the fork oil if needed (see service manual). Use only type and weight of oil recommended by the fork manufacturer. Bleed all air from the damper rods or cartridges. This will affect oil level if not done.
5. On most models, fork oil levels are set with the fork springs out and the forks fully compressed. Consult your vehicle’s service manual for the proper procedure. Support the forks in a vise, in an upright position. Caution: Over tightening the vise will the permanently damage the fork tubes.
6. Set the fork oil level tool by adjusting the collar up or down on the steel tube. When set properly, the length of tube below the collar will be equal to the fork manufacturer’s oil level. Install the steel tube into the fork tube, resting the collar on top of the fork tube. At this point the end of tube should be submerged in oil; add oil if needed.
7. While holding the collar securely on the fork tube, withdraw the pump plunger with the other hand. Continue this process until no more oil is being pumped from the fork tube.
8. Reinstall the springs, caps and any washers or spacers removed. Tighten the caps to the manufacturer’s torque specification. Reinstall the fork tube assemblies. Refer to your vehicle’s service manual.
Please Note: Oil level affects the last 1/3 of fork travel. A higher fork oil level will increase resistance to bottoming, while a lower oil level will make the last 1/3 of fork travel softer. Too high a fork oil level will cause hydraulic lock, which can result in seal leakage. Always stay within the fork manufacturer’s oil level range.


